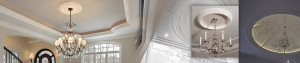
A ceiling medallion is a decorative accent that covers the part of the ceiling where a light fixture is attached. They can range from the very basic to highly ornate and patterned. The size of the ceiling medallion is typically matched with the size of light fixture that it’s paired with. Installing a ceiling medallion is quite doable for the average DIYer. In this article we’ll go over the tools needed and the various steps required for how to install a ceiling medallion.
Materials List
To install a ceiling medallion, you’ll need the medallion itself along with some needle nose pliers, a drill or screwdriver, screws, wood filler, putty knife, paint and brush, glue and caulking.
Preparation And Safety
Test to make sure you have all the necessary parts and everything fits before proceeding. If you need to paint the ceiling medallion, you might as well do this before you install it. Allow it to dry completely. Make sure to turn off the power at the circuit breaker box before attempting the installation. Remove the existing light fixture from the ceiling and the wires.
Installation
Make sure the decorative side of the ceiling medallion is facing the right way and thread the wires through the central hole. Centre the ceiling medallion over the hole it’s going to cover and mark where you want it to sit. Apply a decent amount of glue or caulking to the ceiling side of the medallion and hold it into place until you can secure it to the ceiling with the screws. If there are any gaps between the ceiling and the ceiling medallion you can fill this in with paintable caulking.
Final Touches
Once the ceiling medallion is securely in place you can reattach the light fixture to the exposed wires. If you needed to add paintable caulking, sand down any rough edges once it’s dried and give it a coating of paint. Turn the power to the circuit back on and make sure the light works as required. Stand back and enjoy the fruits of your labour!


No responses yet